How to Make Yarn with Yarn Scraps
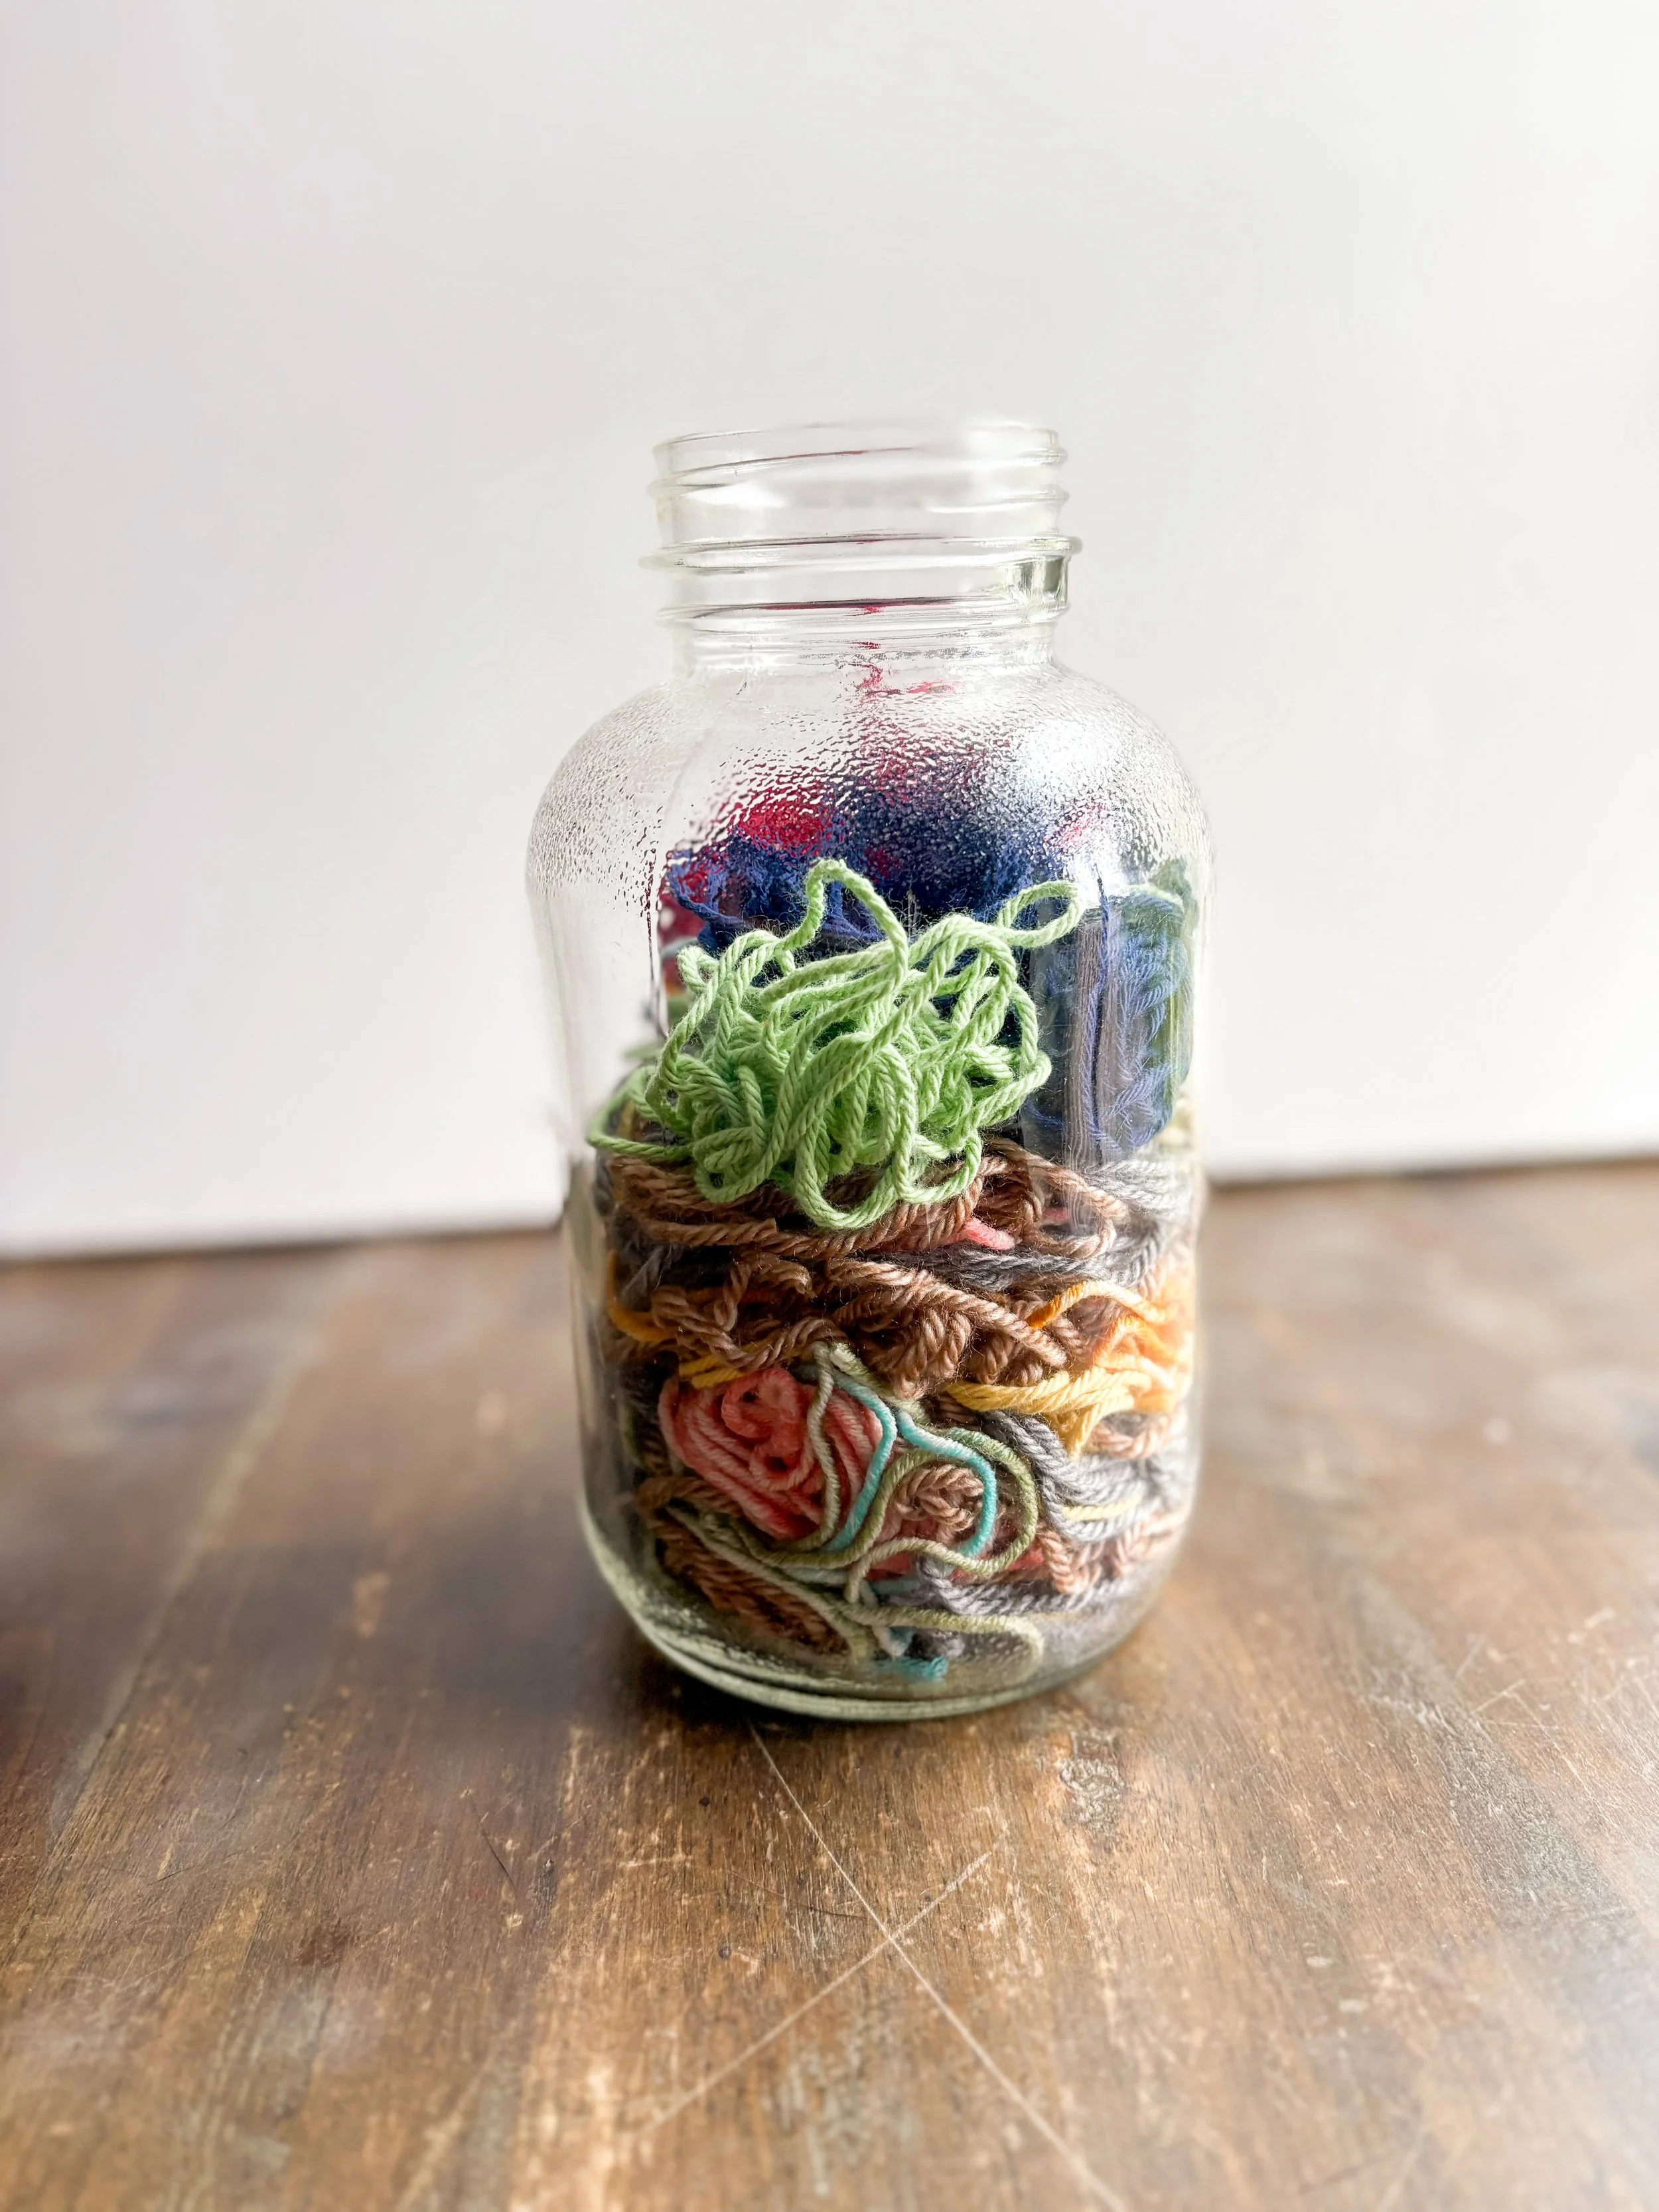
We all have those little bits of yarn that are too precious to toss but too small for most projects. Instead of letting them languish in a forgotten corner, imagine transforming them into entirely new, custom-blended yarn! This isn't just about reducing waste; it's about becoming a true fiber artist, creating unique textures and colorways that are truly your own.
This method involves breaking down your yarn scraps back into their individual fibers using a process called carding, and then re-spinning them into a new strand. It's a bit more hands-on than simply tying knots, but the reward is a beautiful, cohesive yarn unlike any you could buy.
Why Go the Extra Mile?
Ultimate Customization: Blend colors, fiber types, and textures precisely how you envision them.
Zero Waste Hero: Give a complete second life to every last fiber.
Art Yarn Potential: Create truly unique, textured, and often "tweedy" yarns.
Deep Satisfaction: There's a special joy in spinning your own yarn from scratch, even from scraps!
Want To Watch How to Make It Instead?
What You'll Need:
Yarn Scraps: Best results come from natural fibers like wool, alpaca, mohair, or even cotton. Acrylic can be spun, but it's often more challenging to get it to hold twist once "unspun."
Sharp Scissors: For cutting your yarn into short lengths.
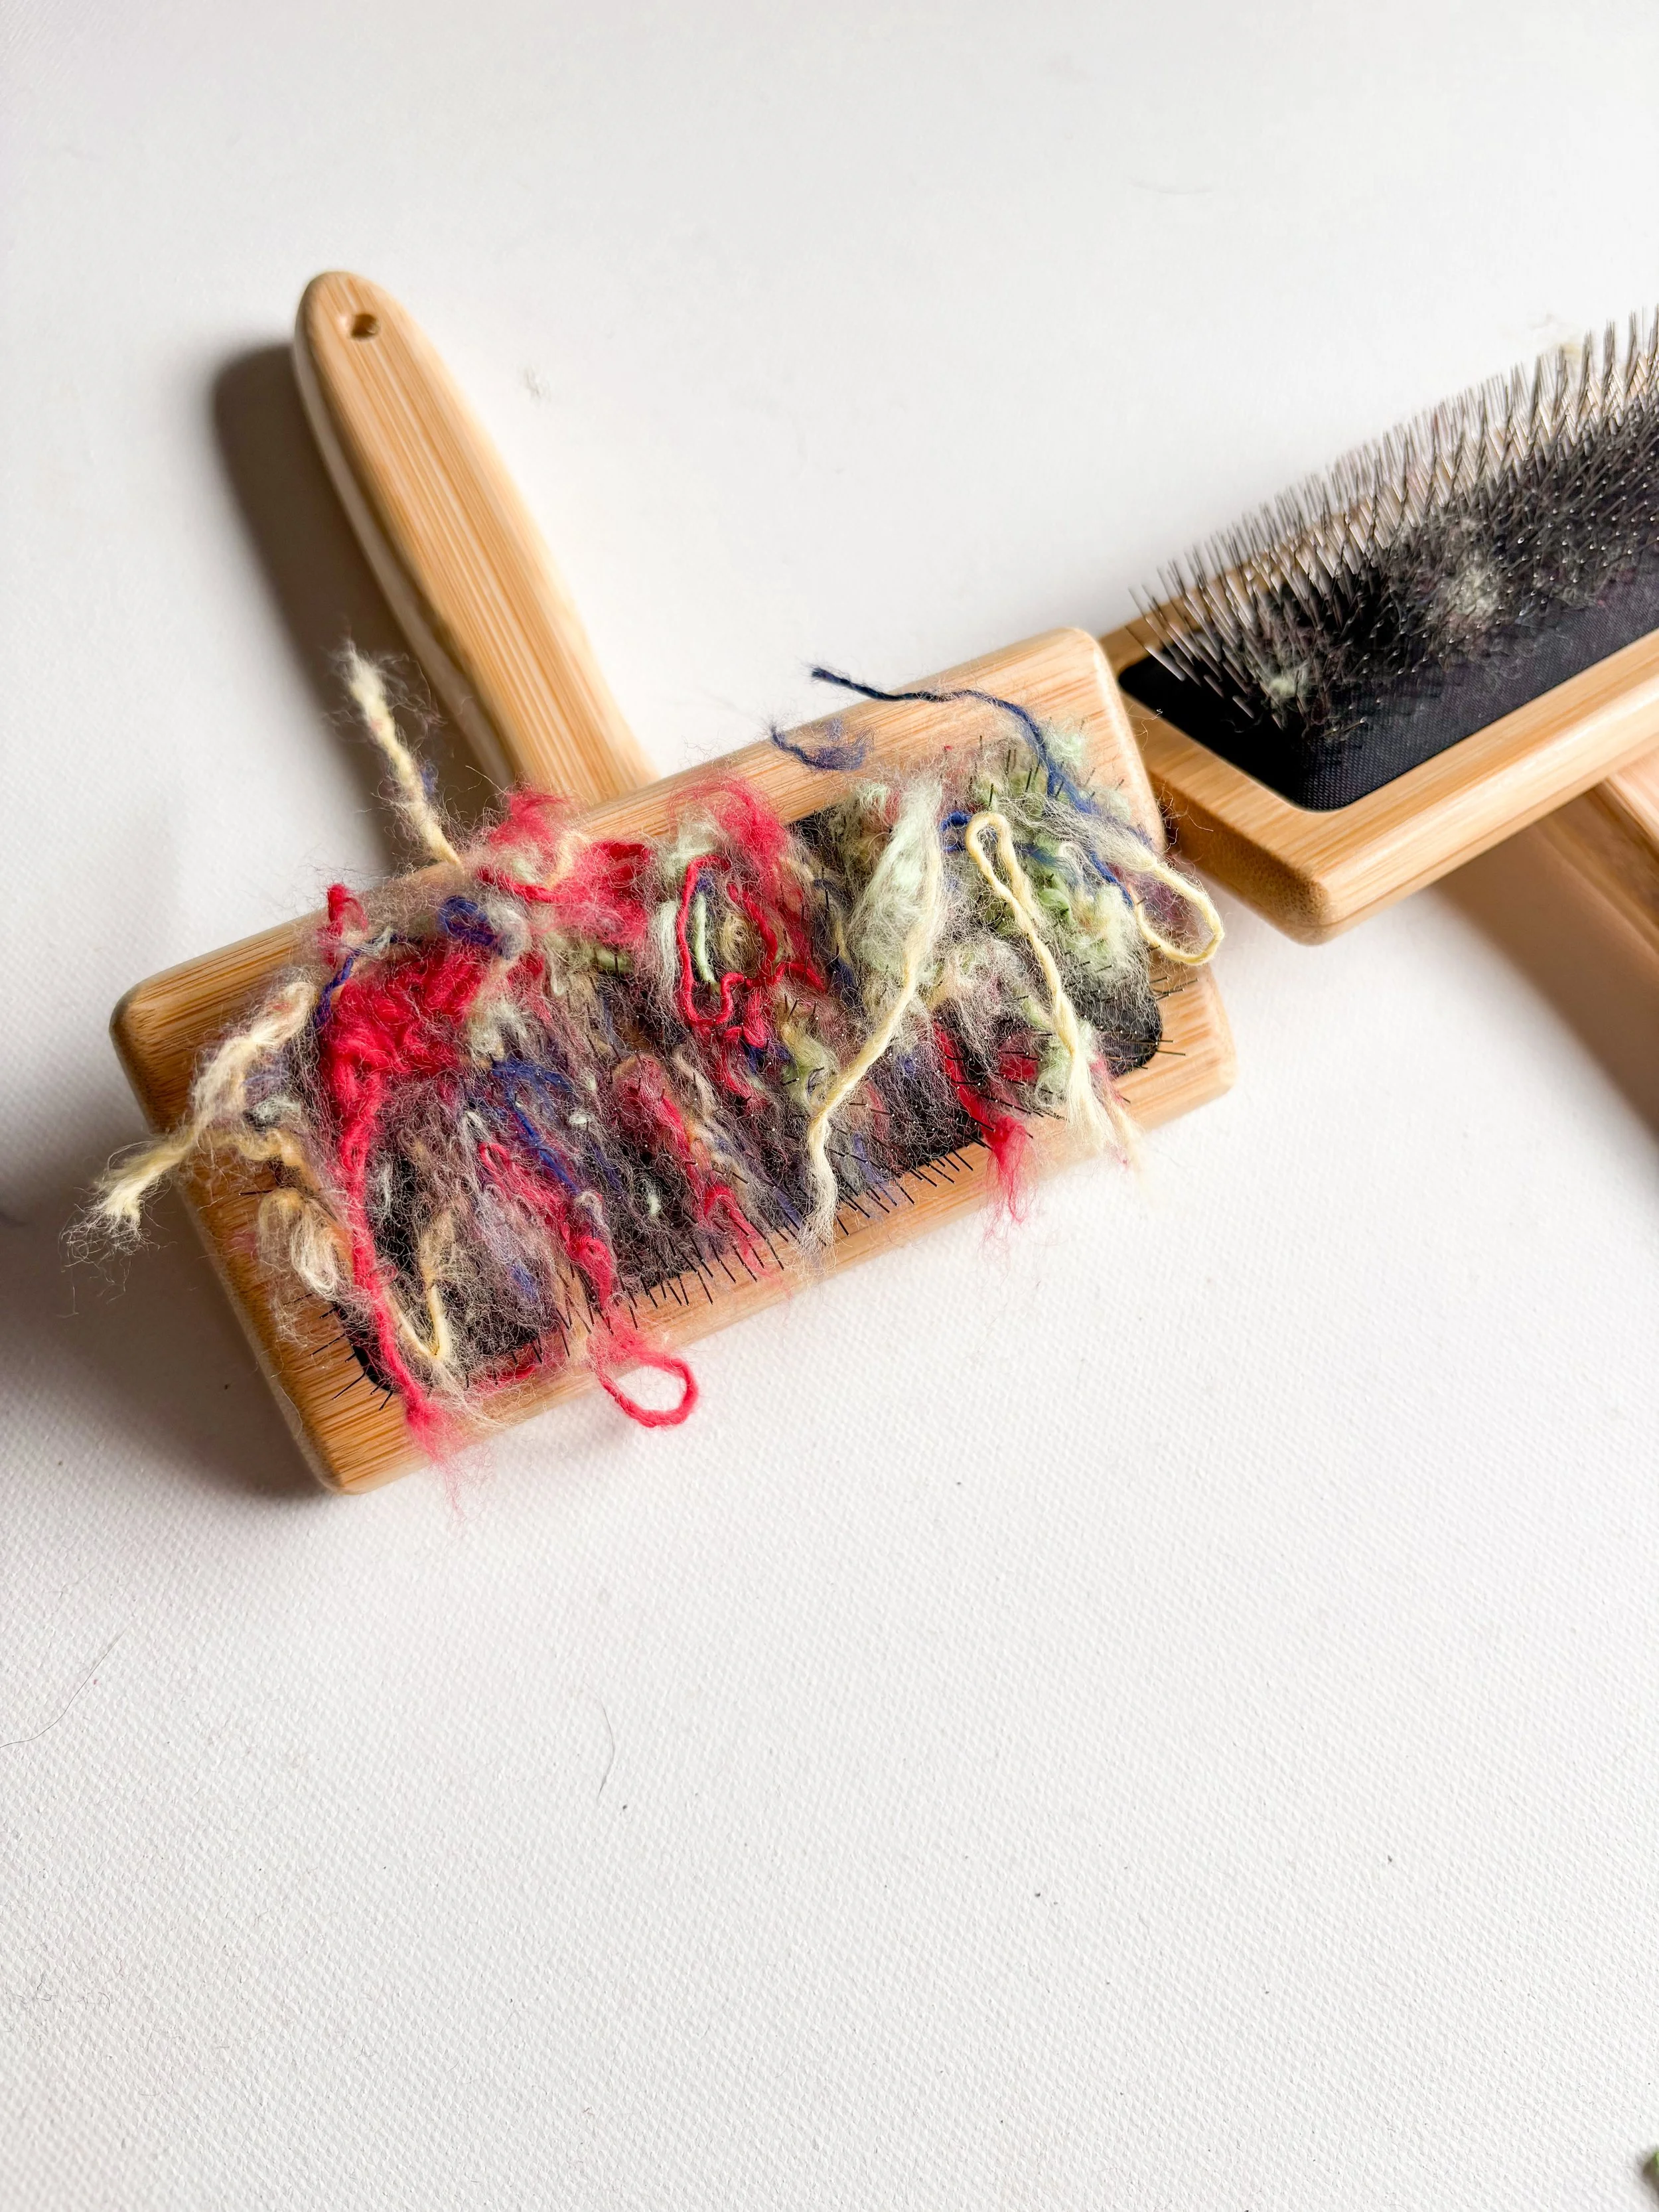
Hand Carders (Recommended) or a Pet Slicker Brush (Budget Option):
Hand Carders: These are tools with a bed of fine, sharp wires designed specifically for aligning fibers. They'll give you the best results for consistent fiber preparation.
Link to carders used in video: https://amzn.to/4kyp25r
Pet Slicker Brush: For small amounts of yarn scraps, a stiff-bristled pet slicker brush (the kind with many fine wire pins) can be a surprising substitute for "carding" by pulling the yarn apart into fluff. It won't be as efficient or even as proper hand cards, but it can work in a pinch for small batches.
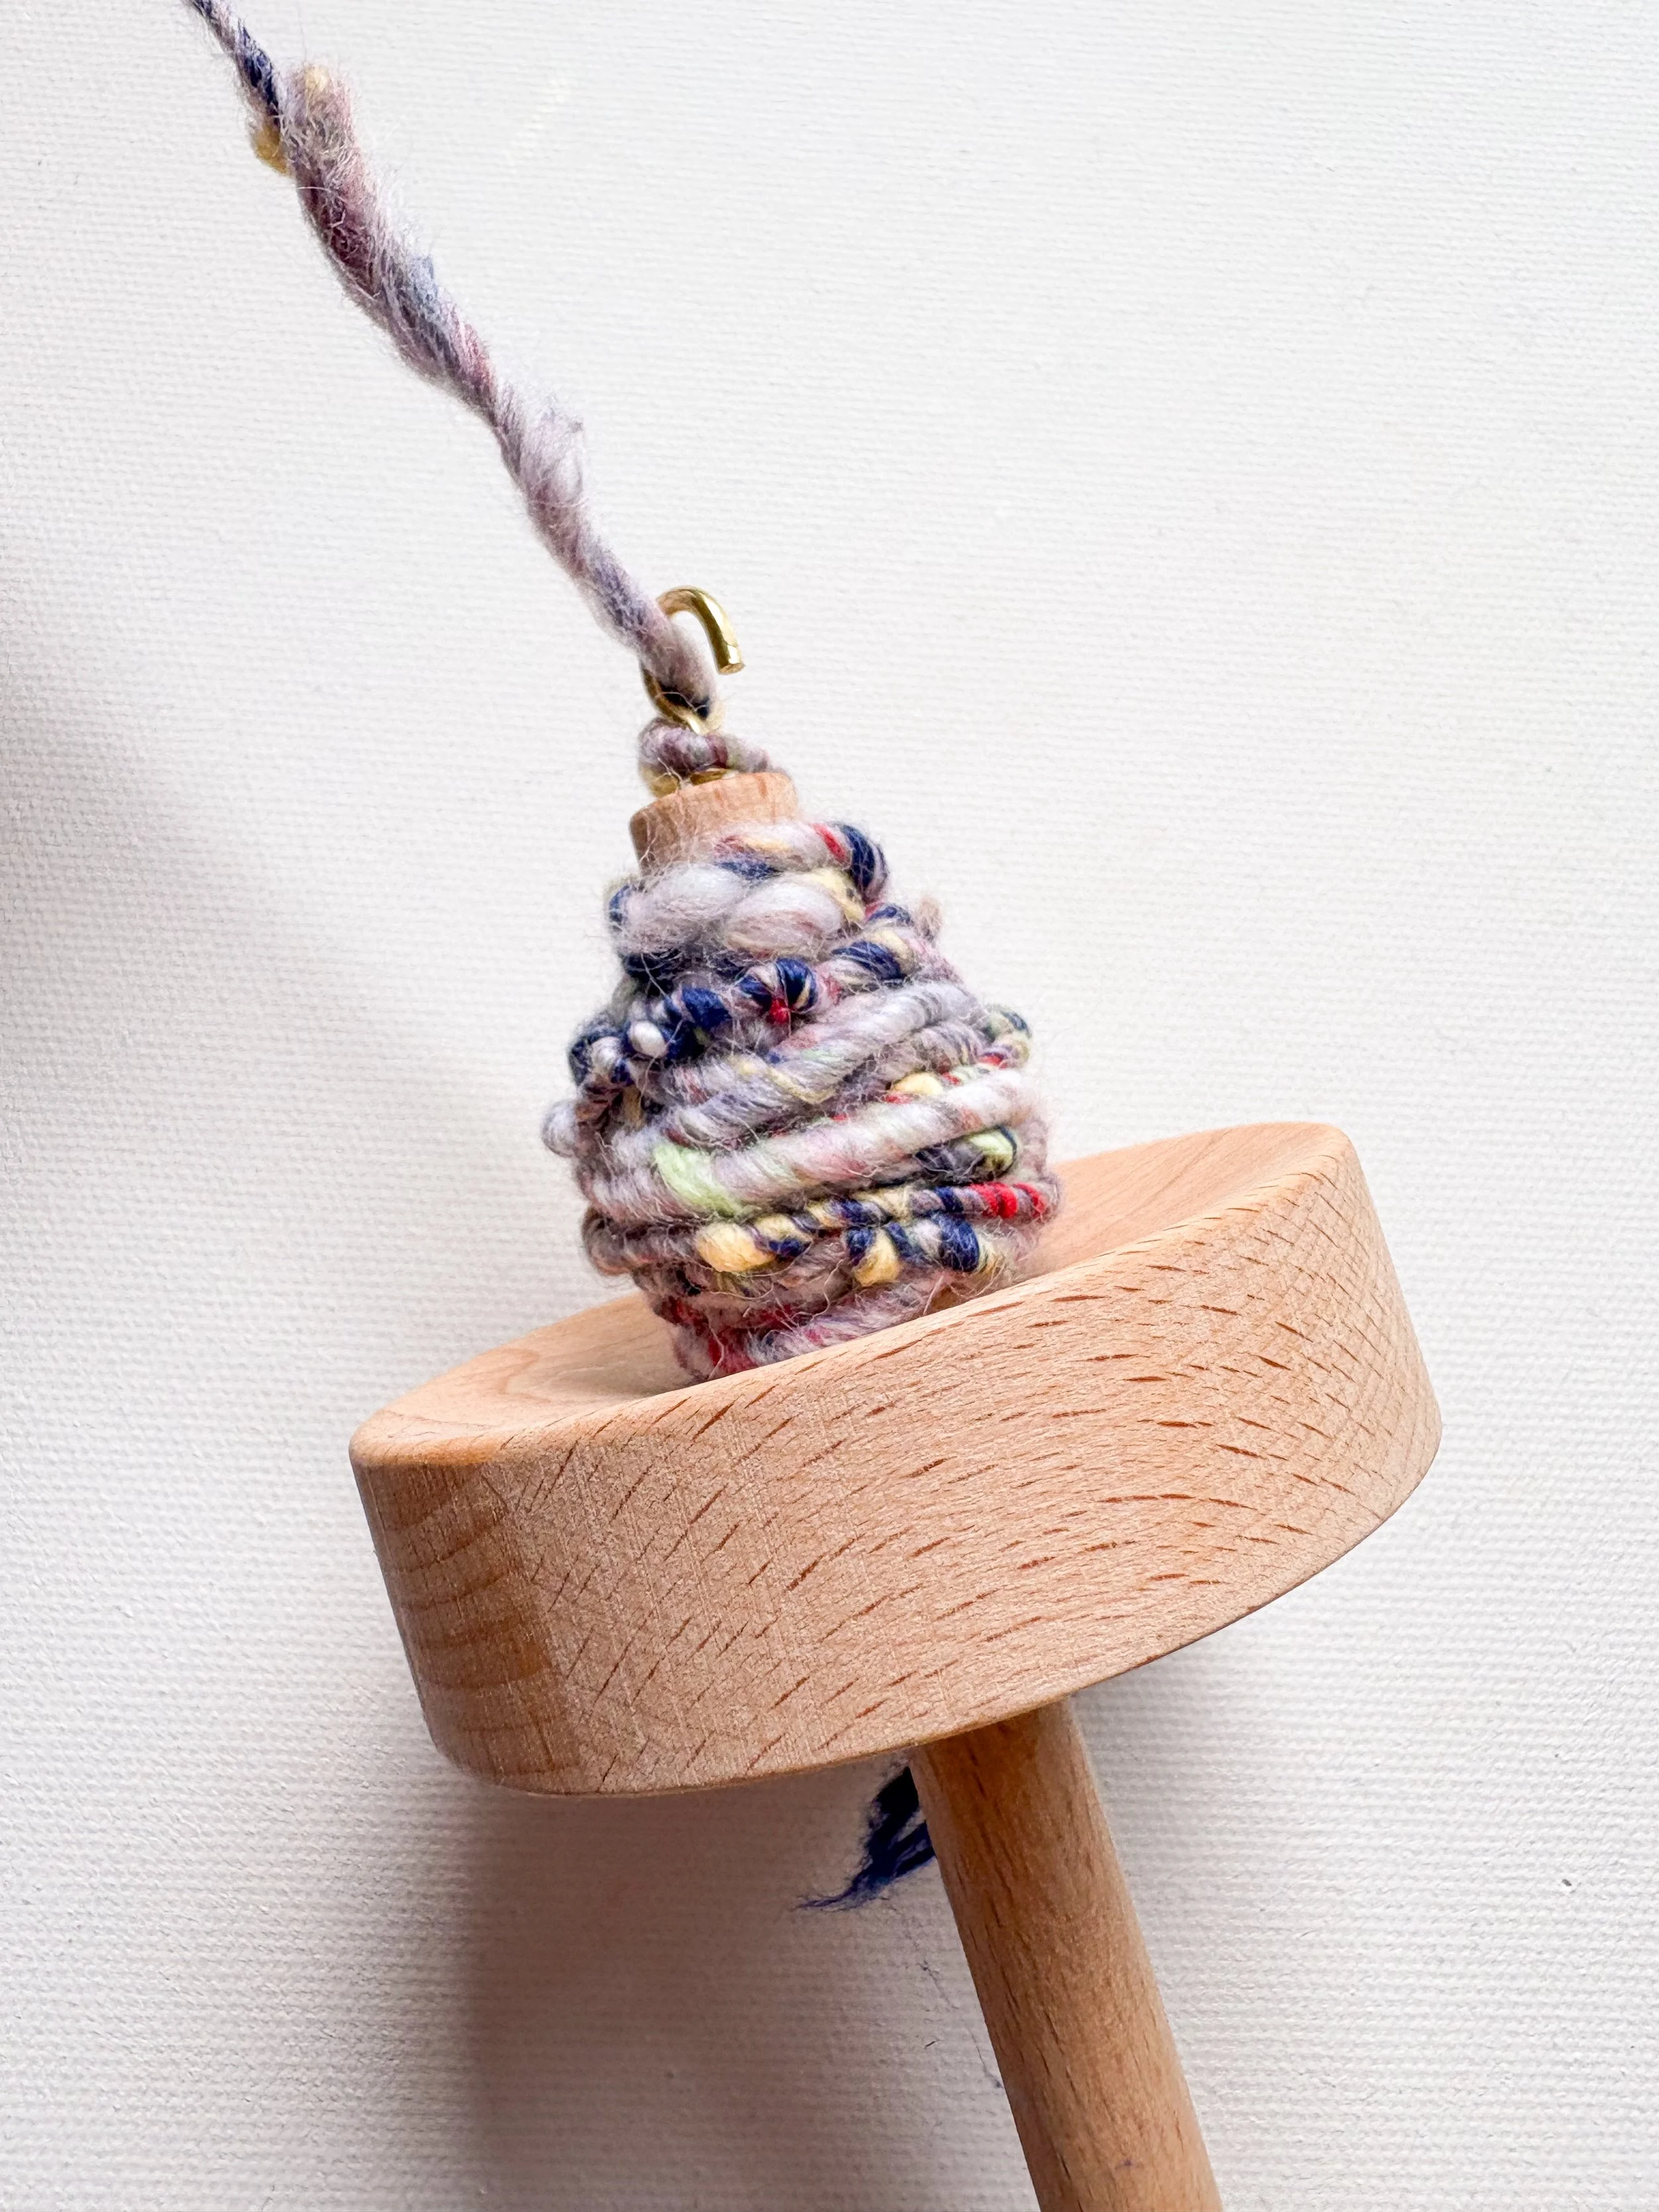
Drop Spindle or Spinning Wheel:
Drop Spindle: An accessible and portable tool for handspinning. Great for beginners.
Link to drop spindle: https://amzn.to/3TsLYrZ
Spinning Wheel: Faster and more efficient for larger quantities, but a bigger investment.
Roving or Commercial Fiber (Optional but Recommended): Adding a small amount of raw fiber (like wool roving) can act as a "binder" and make it easier to incorporate your recycled yarn bits, especially if they are very short or a challenging fiber type.
Link to Roving: https://amzn.to/4nGwJcJ
A "Leader" Yarn: A sturdy piece of yarn to get your spinning started on your spindle or wheel.

The Process: Step-by-Step
This method essentially reverses the spinning process, then re-spins it anew.
Step 1: Deconstructing Your Scraps
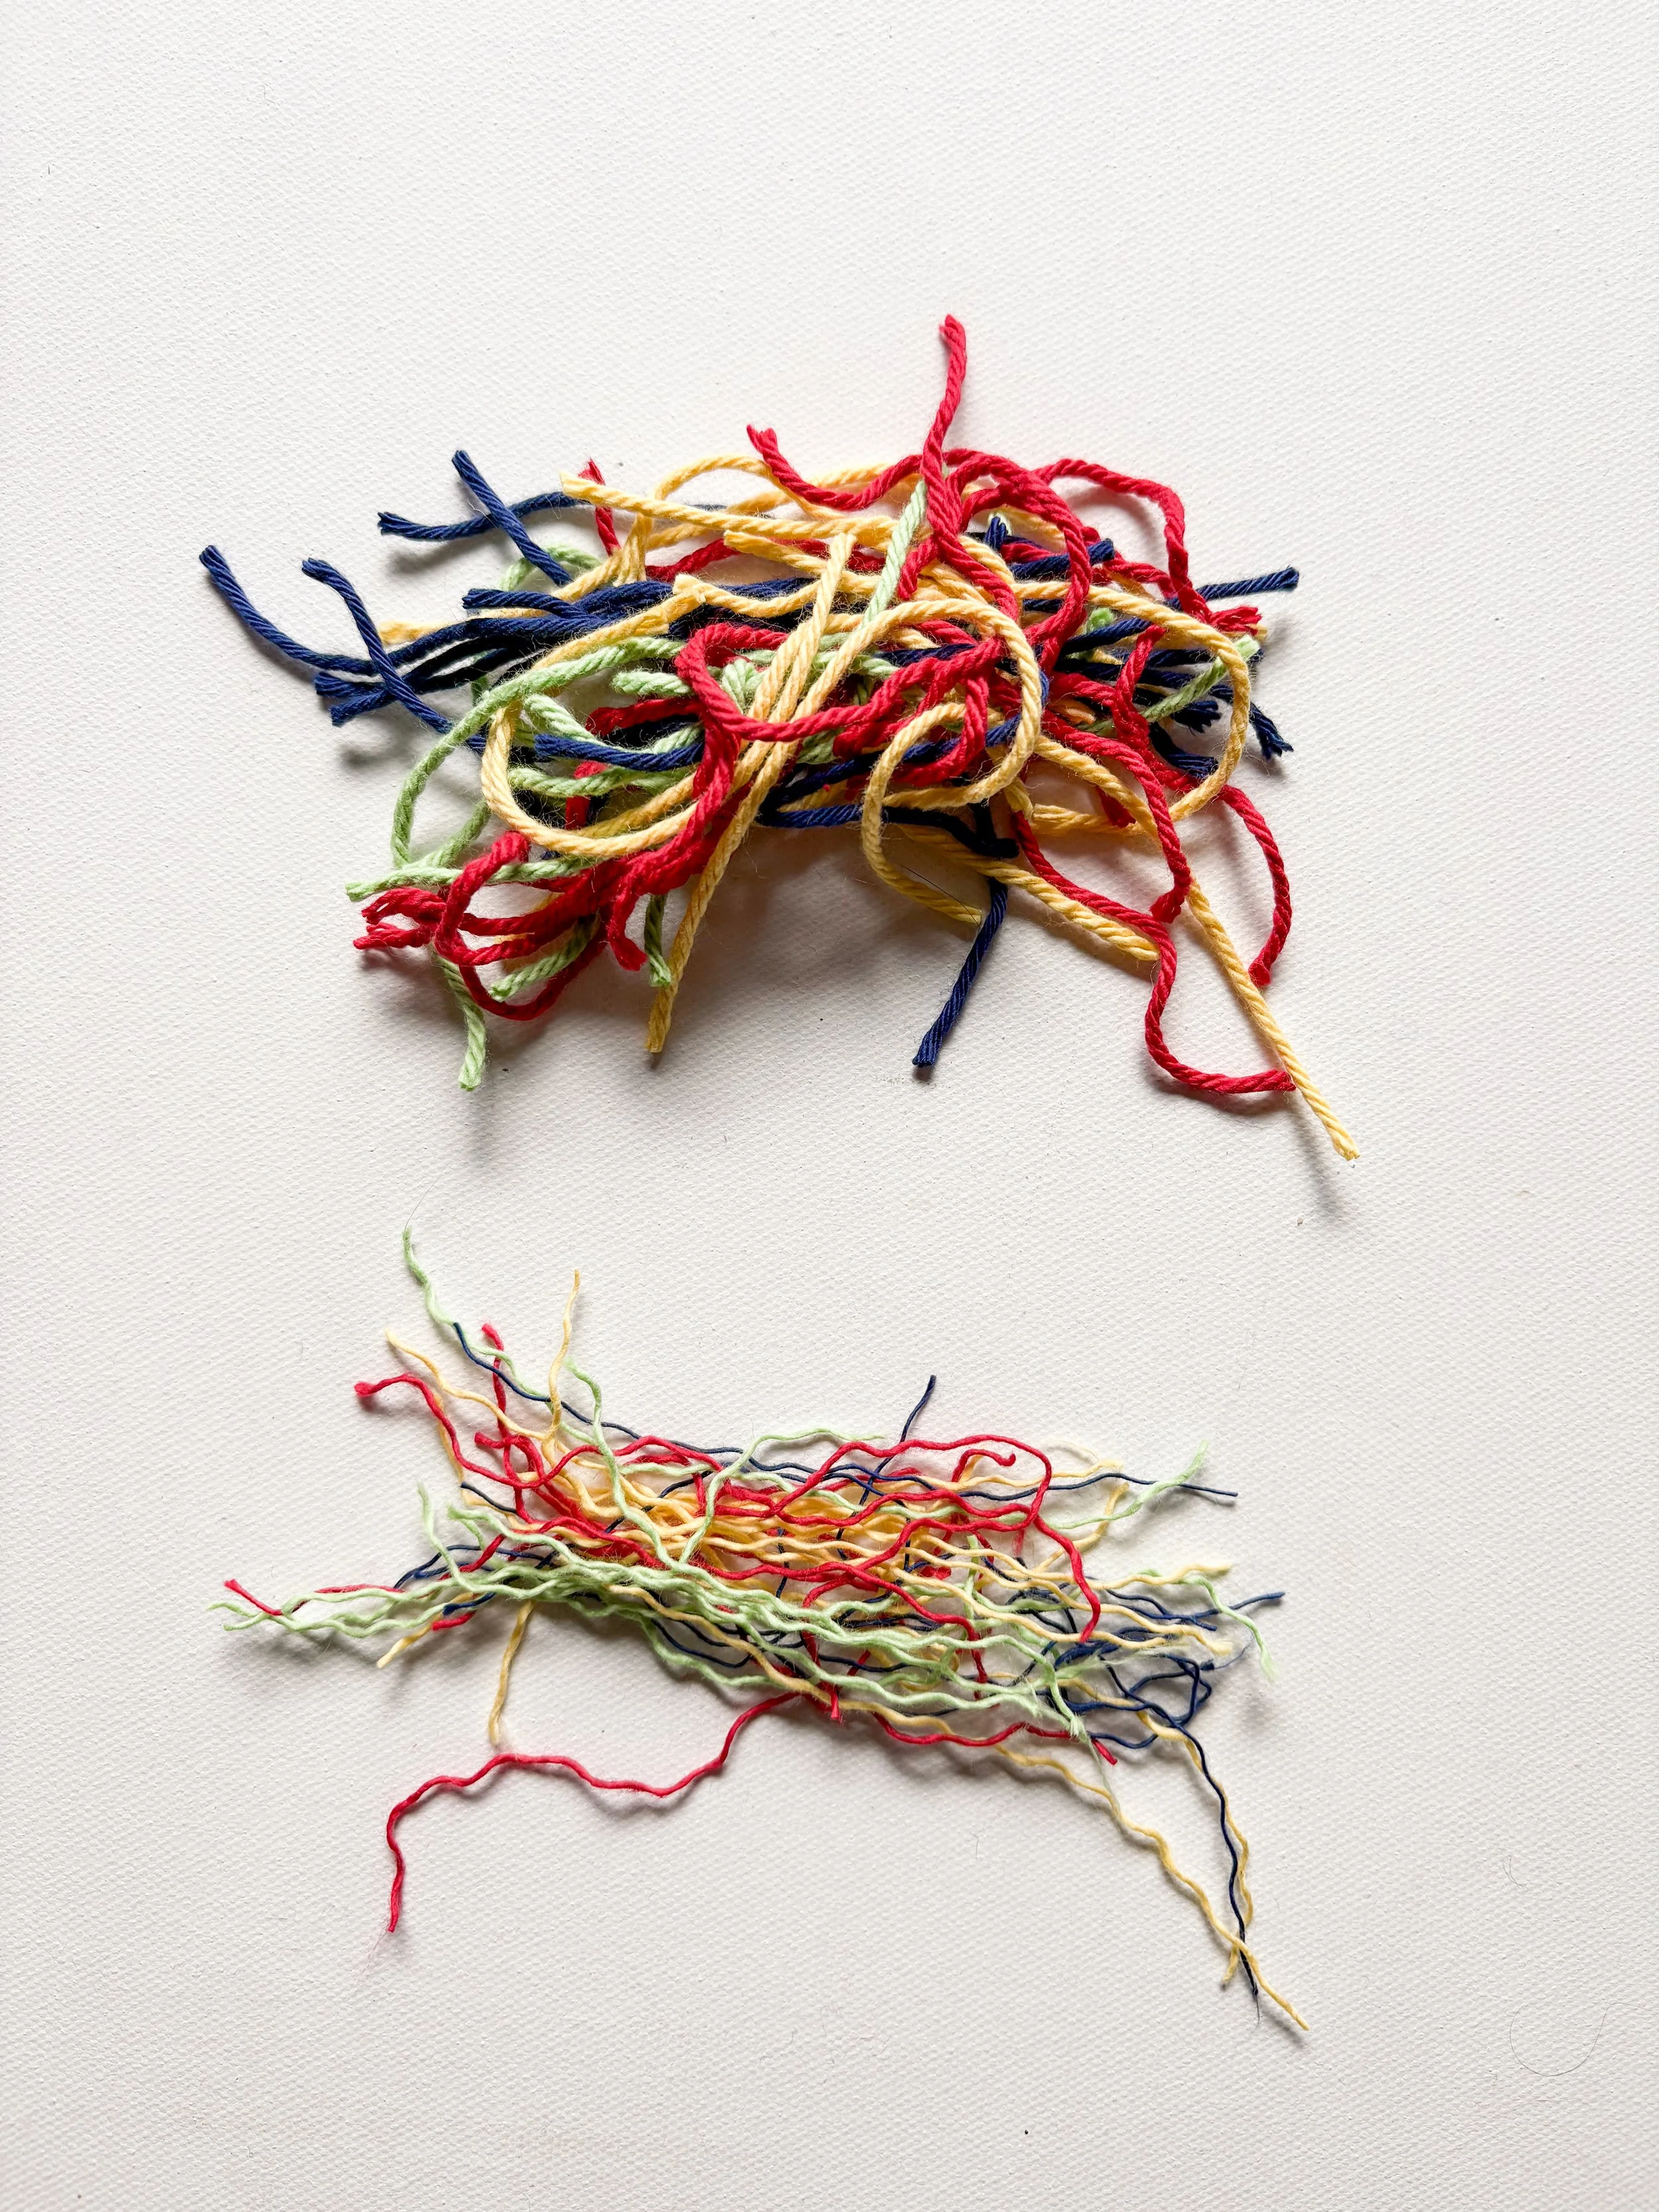
Chop 'Em Up: Take your yarn scraps and snip them into small pieces. The ideal length will depend on your fiber and spinning style, but generally aim for about 1/2 inch to 2 inches. Shorter pieces integrate better, but too short can be hard to control. Longer pieces might poke out more, creating a "tweedy" or "art yarn" effect.
Separate the Plies (Optional but Helpful): If your yarn scraps are plied (most are!), gently untwist them and separate them into their individual strands. This further "opens up" the fiber and makes it easier to card.
Step 2: Carding Your "New" Fibers
This is where you'll use your hand carders or pet brush to prepare the fibers for spinning. The goal is to disentangle the yarn bits and align them into a fluffy, somewhat uniform mass.
Using Hand Carders:
Take a small clump of your chopped yarn scraps.
Place it on one hand card.
Use the other hand card to gently brush the fibers, pulling them from one card to the other. Work slowly and in one direction, trying to make the fibers parallel.
Repeat, transferring the fibers back and forth, until they are fluffed up and relatively aligned.
You'll end up with a "batt" or "rolag" (a fluffy cigar-shaped roll of fiber) ready for spinning. If adding commercial fiber, blend it in now by layering it with your scrap fibers on the carders.
Using a Pet Slicker Brush (for small amounts):
This is a less efficient but workable option for very small quantities.
Hold a small clump of chopped yarn scraps on the brush.
Use another brush (or just your fingers) to gently pull the fibers against the brush's pins, opening them up.
You won't get a perfectly aligned batt, but you can create a fluffy mass. You may need to pick off the fluffed fibers from the brush and gather them into a loose bundle for spinning.
Step 3: Spinning Your Recycled Yarn
Now that your yarn scraps are transformed back into a more manageable fiber form, it's time to spin them!
Prepare Your Spindle/Wheel:
Attach your leader yarn to your drop spindle hook or spinning wheel bobbin.
Drafting and Spinning:
Take your prepared batt or fluffy clump of recycled fibers.
Attach the leading end of your fiber to your leader yarn.
For a Drop Spindle: Start your spindle spinning. As it spins, gently draft (pull and attenuate) a small amount of fiber from your prepared mass. The twist from the spindle will travel up and catch the drafted fibers, forming a single strand of yarn. Continuously draft new fiber and allow the twist to incorporate. When you run out of one batch of carded fiber, simply overlap the end with the beginning of the next, allowing the twist to secure them together.
For a Spinning Wheel: The principle is the same, but the wheel automates the twisting. Feed your fiber into the orifice, drafting as you go, and let the wheel do the work of twisting it into a single.
Ply (Optional but Recommended): Once you've spun all your recycled fiber into a "single" strand, it's highly recommended to ply it. Plying involves twisting two or more single strands together in the opposite direction from which they were spun. This adds strength, durability, and balances the yarn, preventing it from curling up.
You can ply your recycled single with another recycled single, or with a commercial yarn for added stability or different effects.

Step 4: Finishing Your Yarn
Wind into a Skein: Once spun and plied, wind your new yarn off your spindle or bobbin into a skein. You can use a niddy noddy, a swift, or even the back of two chairs. Tie off the skein in several places to prevent tangling.
Wash and Set the Twist: Gently wash your skein in lukewarm water with a mild soap. Squeeze out excess water (don't wring!), and hang it to dry, often with a light weight attached to the bottom. This relaxes the fibers and sets the twist, giving you a beautiful, stable skein of yarn.

Tips for Recycled Spinning:
Fiber Content Matters: Wool and other animal fibers that have "crimp" (natural waviness) are easiest to recycle this way as their scales naturally want to grab onto each other when spun. Acrylic can be spun, but it may feel more slippery and be prone to less cohesive results.
Cut Length is Key: Experiment with the length of your chopped scraps. Shorter lengths will give a smoother, more uniform yarn, while longer pieces can create a tweedy or neppy texture.
Add a Binder: If your scraps are very short, slippery, or a mix of challenging fibers, blending in a small amount of virgin roving (especially wool) can help the fibers stick together and make spinning much easier.
Embrace the Imperfection: Your recycled yarn won't be perfectly uniform like commercial yarn, and that's its charm! Celebrate the unique slubs, color variations, and textures you create.
Practice Makes Progress: Spinning takes practice. Don't be discouraged if your first attempts are a bit wonky. With each try, you'll improve your drafting and tension.
Transforming yarn scraps into new fiber and then into yarn is a deeply rewarding process. It's a testament to sustainability, creativity, and the enduring magic of fiber arts. So, gather those snippets, grab your carders and spindle, and get ready to spin some treasure!
Happy Crafting!

Free Crochet Skills Checklist
I’ve created a pathway for crocheters to learn the skills they need to make beautiful things without the added frustrations!